Introduction
After spending many hours painstakingly attempting to model creatures entirely by hand, I finally discovered (a couple of years ago) the skin modifier in Blender, which is a fantastic quick way to build organic creatures and shapes, especially for the artistically challenged like myself, and also makes rigging a breeze. I thought I would write a quick description for those unfamiliar.
If you want ultimate control, particularly for a low poly creature, there is no substitute for manually creating polys. However this can be very time consuming and tedious. If you are instead in a position where you are willing to trade off speed of creation against 'perfect rendering efficiency', or are making medium / high poly models, or models for later sculpting, then one of the options available is the skin modifier.
The skin modifier works instead of modelling the skin by hand, instead you place the joints (as vertices) of a creature to build a kind of skeleton, and allow the skin modifier to automagically generate a skin around this skeleton.
Process
- Typically I start off by creating a plane, then go into edit mode, and merge the vertices to 1 in the centre.
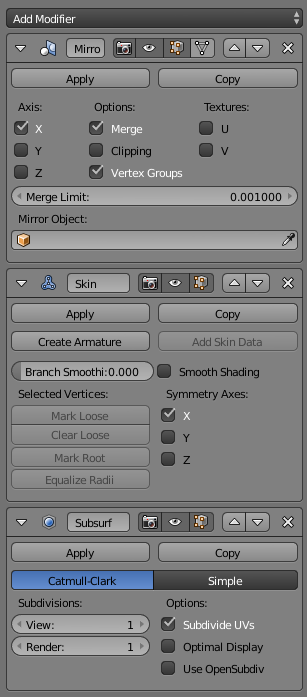
- Next set up the modifier stack to create the skin. At the top of the stack goes a mirror modifier, because most animals are symmetrical bilaterally. Next goes the skin modifier, which creates a simple box-like skin around the skeleton. Finally add a subsurface modifier to smooth the skin, and make it more organic.
-
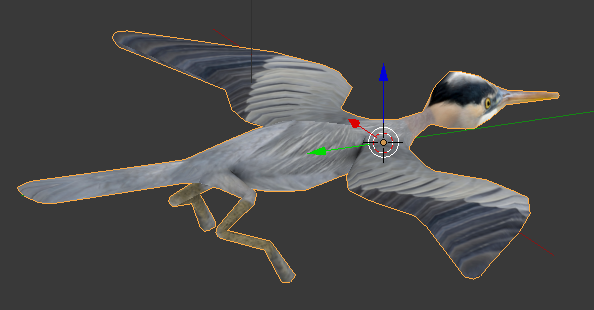
- Once the modifier stack is ready you can begin modelling. In the case of this bird I started with a topdown view.
- Select the start vertex (there should now be a 'blob' around the single merged vertex), and create the skeleton by pressing 'e' to extrude and place a new vertex. I did this to place several vertices to create a backbone for the bird.
- You can then create wings and legs by picking one of the vertices in the backbone, and extruding to the side.
-
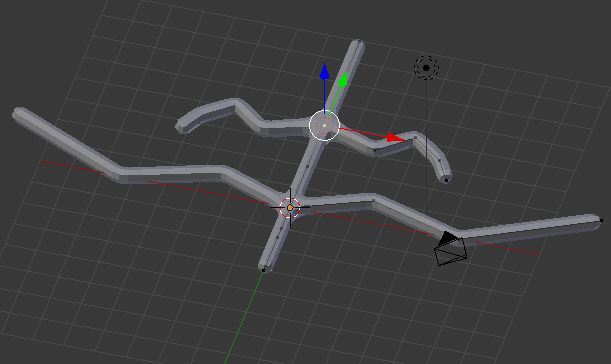
- If you follow this process you can form a rough top down skeleton, it doesn't have to be exact because it is easy to adjust, that is one of the beauties of skin modifier. I find it useful to google pictures of the skeleton of the animal for reference.
- Next look at side views and adjust the up down position of the vertices (joints). The legs needed to be going downwards, and the head slightly up.
- Once I am happy with the basics of the structure, I start to fill it out. You do this by selecting a vertex, then pressing 'ctrl-a' then dragging with the mouse. You can make the skin thicker or thinner at each vertex.
-
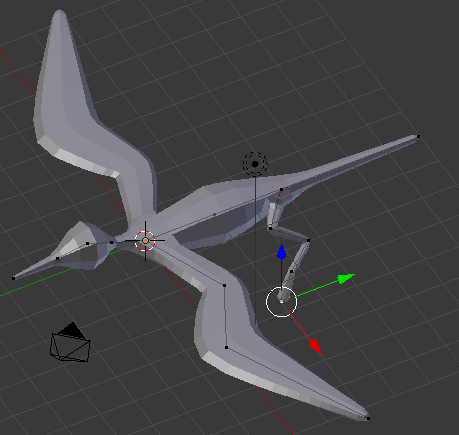
- This can quickly give you a reasonable shape. You can further refine the shape by pressing 'ctrl-a' then limiting to either the x or y axis by pressing 'x' or 'y' before dragging. I used this to give a broad flat tail and wings.
Conclusions
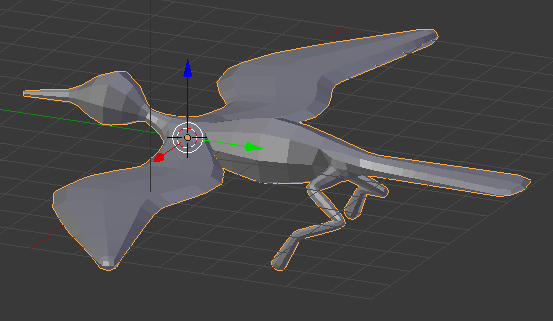
Pretty soon you can build a pretty good model. You can tweak a few things in the skin modifier, especially set a root vertex (e.g. pelvis) can make it easier for later animation.
Skin modifier also makes rigging easy. Once you are happy with your skeleton, make a copy of the whole thing (so you don't lose the original), then choose 'create armature' from the skin modifier. This will create an armature and link it to the mesh so it is ready for posing and animating!
I also typically choose smooth shading in the skin modifier, then manually add hard edges in mesh edit mode (ctrl-e, hard edge, and use in combination with the edge-split modifier). I also use this to select seams for uv mapping. Note that once I finish the skin modifier version I usually have to do a little tweaking of the polys manually, because there are some things it is not good at.
Anyway this has been a brief introduction to this method, I would encourage trying it and following some youtube tutorials.
After some decimating and very rough texturing (~640 tris)


Jeez, this sounds like black magic. Thanks, I'll definitely have to try it.